How to Use Wrist Heart Rate Monitor
You just unboxed a new smartwatch or fitness tracker, and you’re eager to unlock real-time insights into your training, sleep, and recovery. But here’s the catch: wrist heart rate monitors don’t deliver reliable data on their own. Improper fit, wrong placement, or ignoring sensor limitations can leave you with confusing numbers that derail your fitness goals.
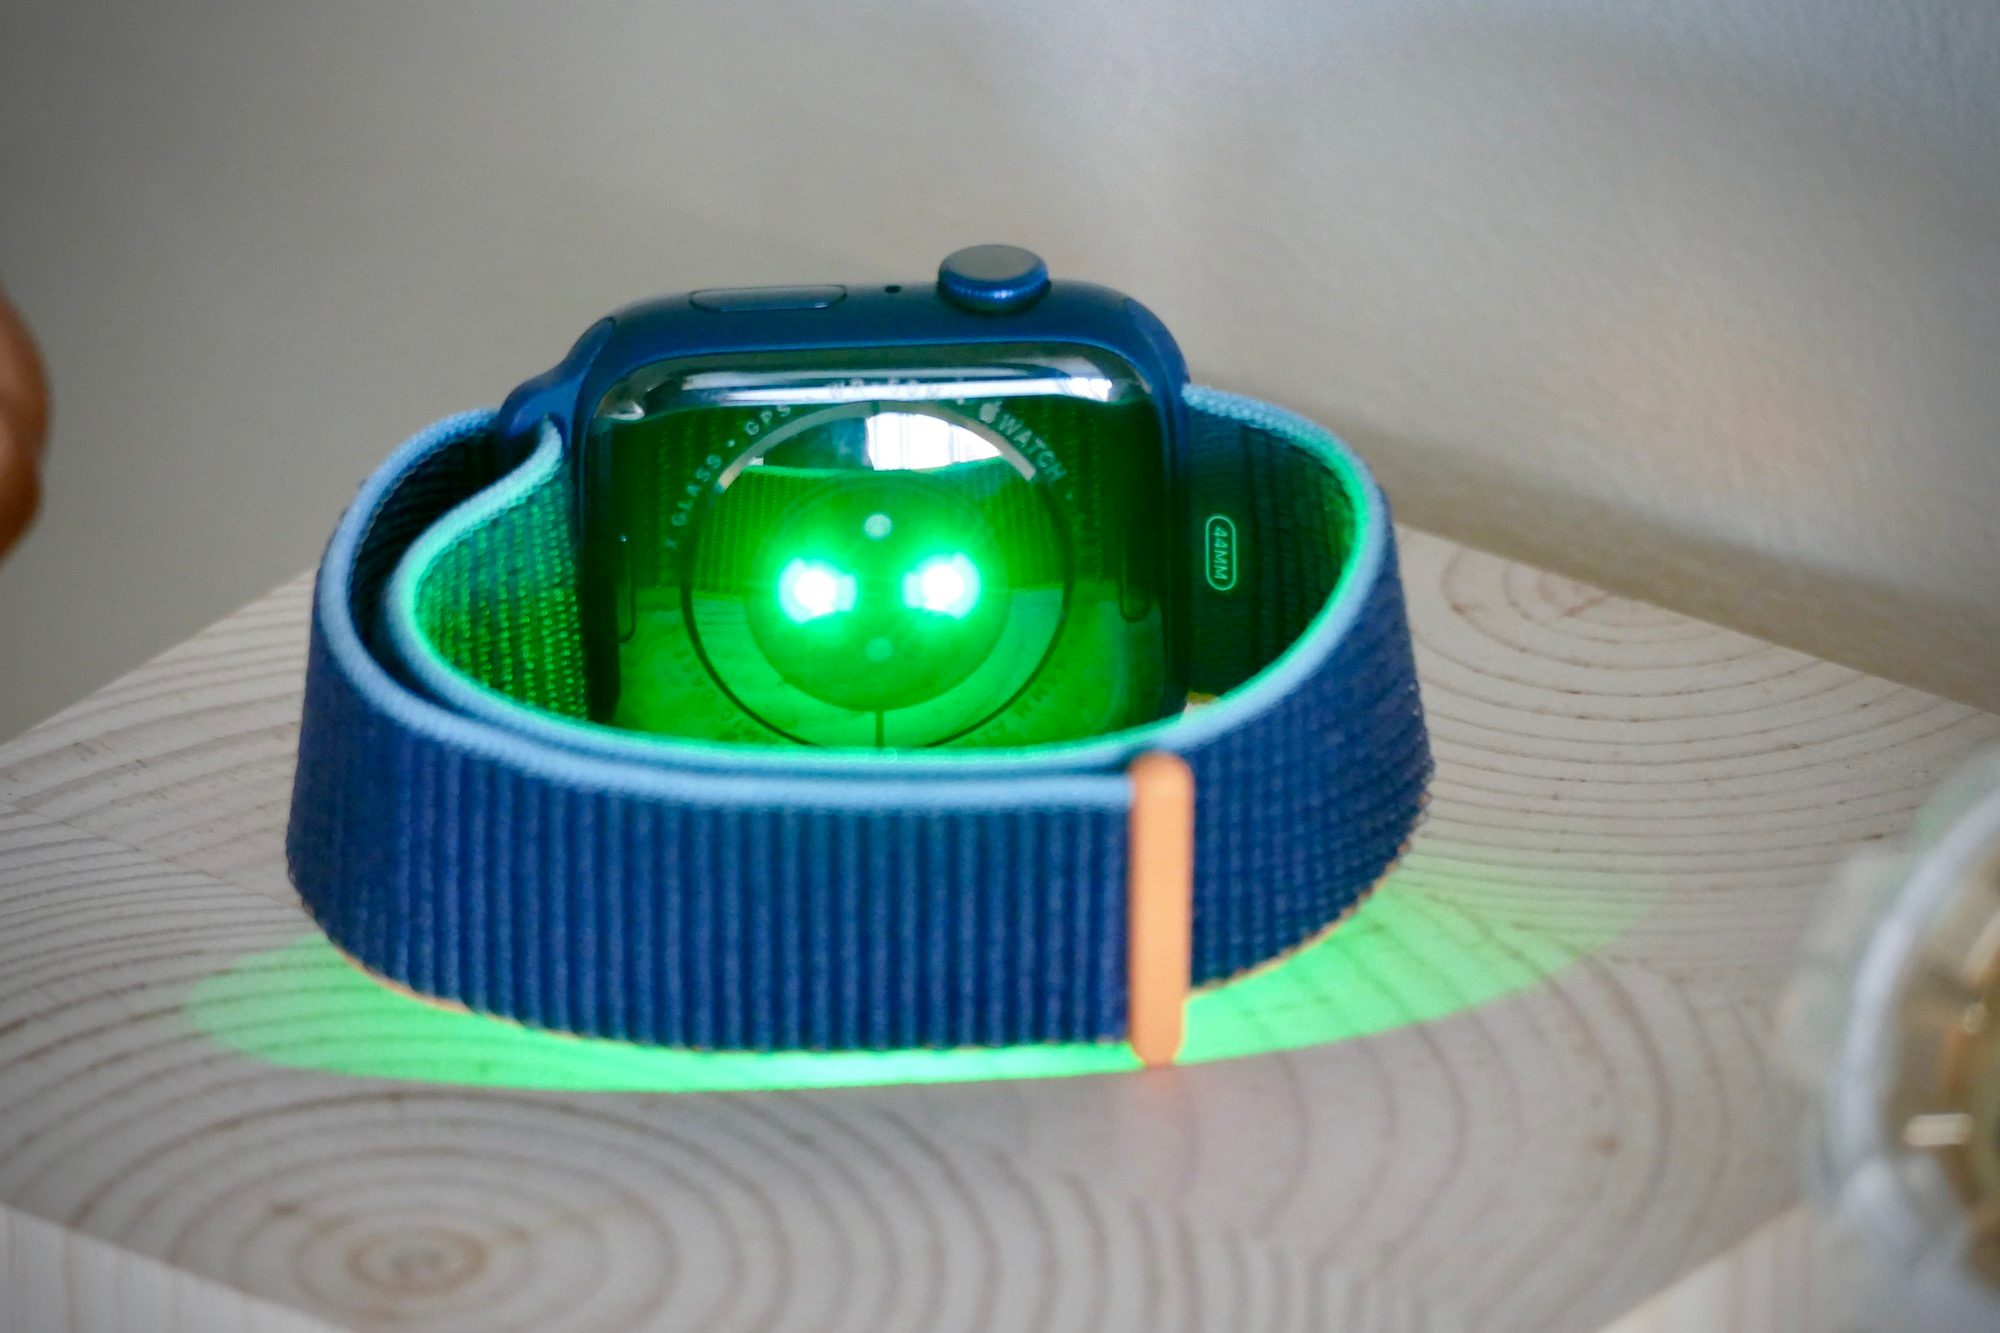
Wrist-based monitors use optical sensors (PPG) to estimate your pulse by detecting blood flow changes beneath the skin. Unlike chest straps that read electrical signals directly, wrist sensors are vulnerable to motion, skin tone, tattoos, and loose fit. The good news? With the right techniques, you can still get trustworthy readings for workouts, daily activity, and recovery tracking. This guide covers everything from initial setup to interpreting heart rate zones, so you can train smarter and avoid common accuracy pitfalls.
Position Your Monitor Correctly for Reliable Readings
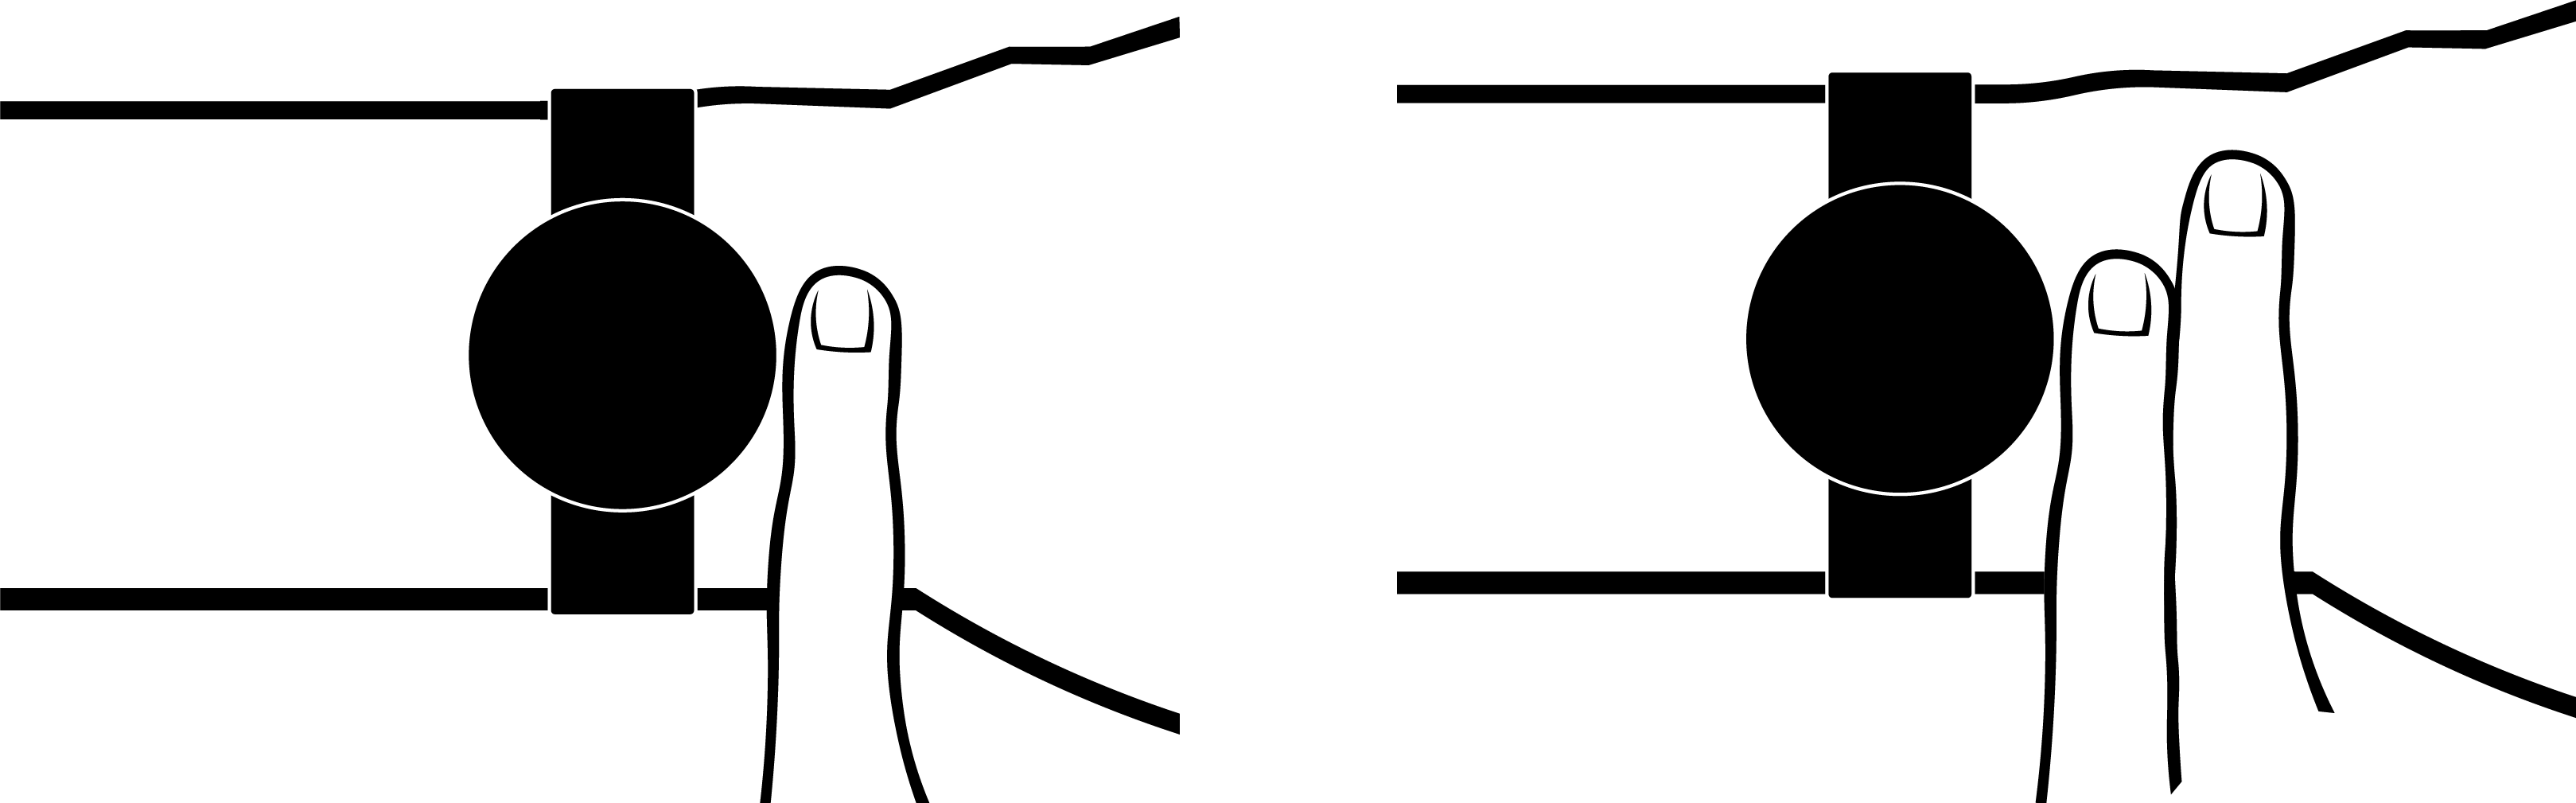
Place It One Finger Above the Wrist Bone
Wear your wrist heart rate monitor on your non-dominant hand, about one finger-width above the wrist bone (distal to the ulnar styloid process). This spot offers consistent blood flow and minimizes bone interference with the optical sensor. The band should feel snug but never restrictive.
If the watch shifts during movement or gaps form between the sensor and your skin, light leakage occurs and readings become erratic. For high-intensity workouts like running or HIIT, tighten the band one notch more than your daily fit to reduce motion artifacts.
Avoid Tattoos and Dark Ink Areas
Dark tattoo ink absorbs the green LED light used in PPG sensors, blocking the signal from reaching your capillaries. If you have a wrist tattoo where the sensor sits, expect frequent signal loss or false readings. Solutions include wearing the watch above the tattoo, switching to your non-tattooed arm, or using a chest strap for critical training sessions.
Calibrate Your Device for Accurate Data
Input Your Personal Metrics
Your device’s algorithm uses your age, weight, height, and biological sex to estimate exertion, calories burned, and training zones. Without this data, your readings lose context even if the raw bpm is correct.
Open your companion app (Garmin Connect, Fitbit, Apple Health, etc.) and enter:
– Age
– Weight
– Height
– Biological sex
These values calibrate VO2 max estimates, recovery times, and zone calculations. A 20-year-old and a 60-year-old at the same heart rate are under very different physiological stress, and your device adjusts accordingly.
Keep Firmware Updated
Manufacturers release firmware updates that improve sensor accuracy and fix bugs. Check for updates weekly until your device confirms it’s current. If you pair an external chest strap or armband, ensure both devices support Bluetooth or ANT+ and follow the app’s pairing instructions exactly. ANT+ often provides a more stable connection for sports equipment.
Start Tracking with Confidence
Allow 1–2 Minutes for Sensor Lock-On
Optical sensors need time to stabilize, especially in cold environments or after removing the watch. When you begin a workout, avoid checking the screen every few seconds, since lifting your wrist disrupts sensor contact.
Start your activity and keep your arm relaxed at your side for the first 60–90 seconds. Most devices lock onto your pulse within two minutes. Cold weather reduces blood flow to extremities, making lock-on harder, so warm up indoors first or wear gloves to maintain circulation.
Watch for Cadence Lock Errors
Runners commonly encounter cadence lock, where the sensor mistakes footstrike vibrations for heartbeats. This happens when your running cadence (steps per minute) matches your heart rate, often in the 160–180 bpm range.
If your monitor shows a steady 170 bpm throughout a run but feels off, stop and take a manual pulse. If the numbers don’t match, tighten the band higher on your forearm or switch to an armband or chest strap for future runs.
Calculate Your Maximum Heart Rate
Use the Revised Formula for Better Accuracy
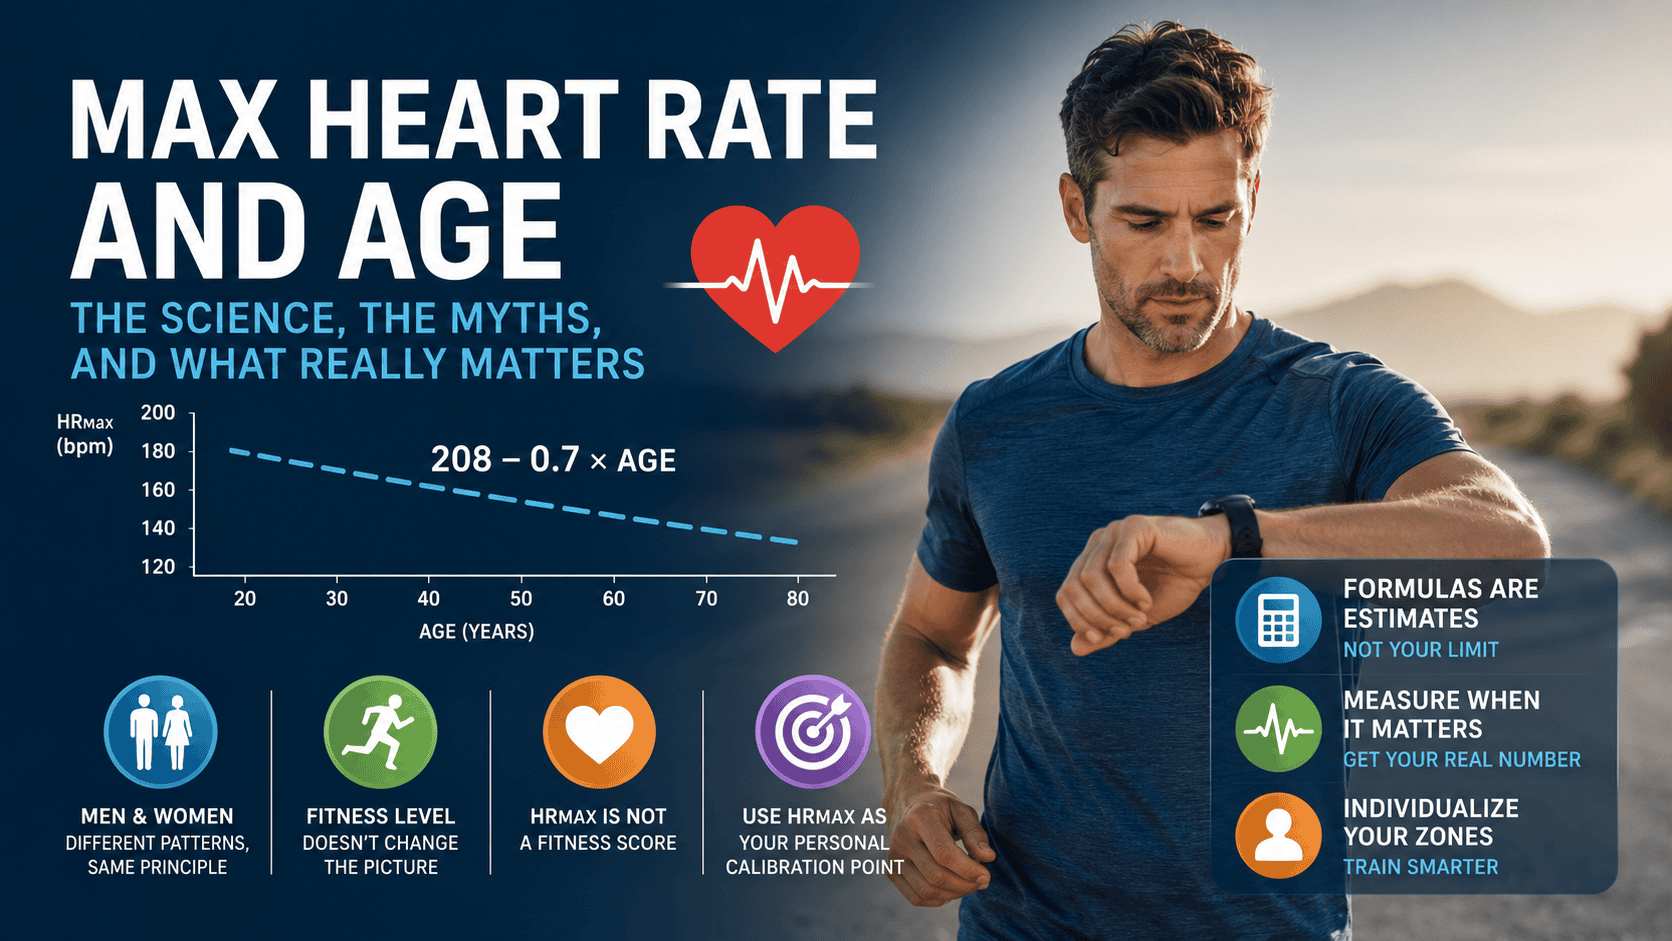
To make sense of your readings, start by estimating your maximum heart rate (HR Max). While lab testing is most accurate, use this revised formula for reliable results:
HR Max = 208 – (0.7 × Age)
This formula outperforms the outdated “220 – age” rule, especially for women and older adults. Your actual HR Max may vary by ±10 bpm, but this gives a solid baseline.
Examples:
– Age 35 → 208 – (0.7 × 35) = 183 bpm
– Age 50 → 208 – (0.7 × 50) = 173 bpm
Program Your Training Zones

Understand the Four Primary Zones
Training zones help you optimize effort. Most wrist monitors let you set custom zones based on percentages of HR Max. Here’s what each zone means:
Zone 1: Recovery (60–70% HR Max)
Easy breathing, comfortable conversation. Ideal for warm-ups, cool-downs, and active recovery.
Zone 2: Aerobic Base (70–80% HR Max)
Steady breathing with slight effort. Builds endurance during long runs or bike rides.
Zone 3: Threshold (80–90% HR Max)
Hard effort with labored breathing. Used for tempo workouts and improving lactate clearance.
Zone 4: VO2 Max (90–100% HR Max)
Maximum intensity, unsustainable beyond minutes. Boosts oxygen capacity with short intervals.
Program these zones into your device so it alerts you when you drift too high or low.
Apply the Karvonen Method for Precision
For personalized zones, use the Karvonen formula, which includes your resting heart rate (RHR):
- Measure RHR: Take your pulse upon waking for 3 days. Average the results.
– Example: (65 + 67 + 69) ÷ 3 = 67 bpm - Calculate Heart Rate Reserve (HRR):
HR Max – RHR → 183 – 67 = 116 bpm - Find your 70% training zone:
(HRR × 0.70) + RHR → (116 × 0.70) + 67 = 148 bpm
Now you know your true Zone 2 starts around 148 bpm rather than a generic percentage.
Address Skin Tone and Tattoo Challenges
Dark Skin and Melanin Reduce Signal Strength
Melanin absorbs the green light used in PPG sensors, making it harder to detect blood volume changes. Users with darker skin tones may see delayed lock-on or inconsistent readings.
To improve accuracy:
– Wear the device tighter than usual
– Place it higher on the forearm
– Consider an armband or ECG chest strap for critical training sessions
ECG remains the only universally accurate method across all skin tones.
Tattoos Block Optical Sensors
Heavy black or dark-colored tattoos absorb LED light, preventing it from reaching capillaries. Even light-colored tattoos with dense ink can interfere.
Test your device during rest to see if it reads consistently. If not, switch arms, move the watch above the tattoo, or use a chest strap for reliable data.
Understand Water and Swimming Limitations
Many wrist monitors are water-resistant, but not all track heart rate accurately in water. Water creates a barrier between the sensor and skin, refracting light and causing data gaps.
If swimming is a key activity:
– Choose a model rated for swim heart rate tracking
– Look for brands like Garmin, Polar, or Apple that optimize underwater algorithms
– Pair a chest strap (such as the Polar H10) with your watch for reliable pool data
Rinse your device after each swim, since pool chlorine and saltwater can degrade seals over time.
Compare Monitor Types Before You Buy
Wrist vs. Chest Strap vs. Armband
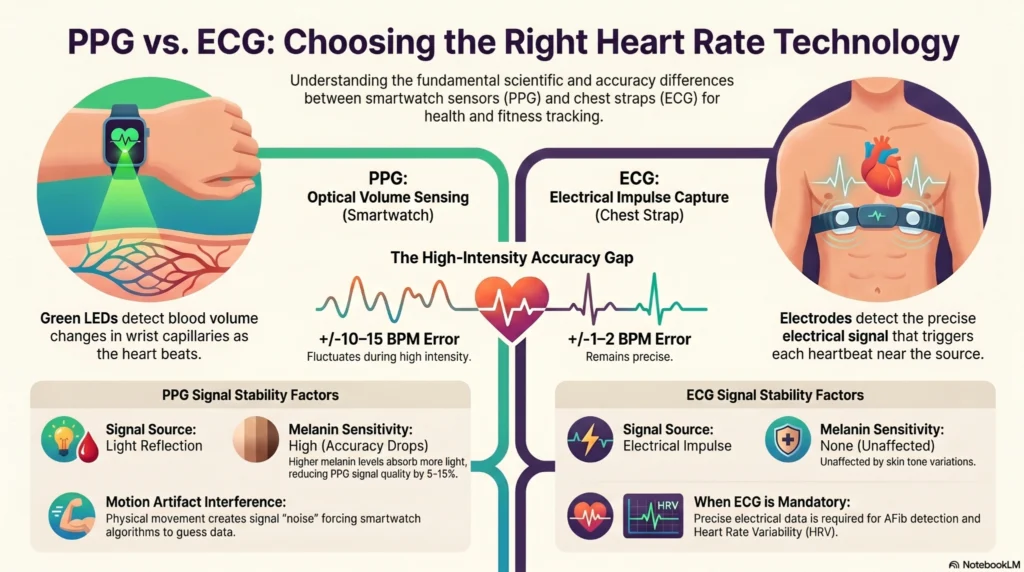
Each type has trade-offs in accuracy, comfort, and use case:
| Feature | Wrist Monitor | Chest Strap | Armband |
|---|---|---|---|
| Sensor Type | PPG (Optical) | ECG (Electrical) | PPG (Optical) |
| Accuracy | Moderate | High (Gold Standard) | High |
| Motion Interference | High | Low | Low |
| Best For | Daily wear, sleep, casual cardio | HIIT, racing, precision training | Running, gym, avoiding chest strap |
| Tattoo/Skin Tone Impact | High | None | Moderate |
| Swim Tracking | Variable | Excellent | Good |
Casual users can stick with a wrist monitor for convenience. Serious runners benefit from a chest strap like the Polar H10 for race-day accuracy. Runners who dislike chest straps should try an armband, which offers better stability than wrist devices.
Leverage Advanced Features Beyond BPM
Track Recovery and HRV
Your wrist monitor can show recovery status through key metrics:
– Resting Heart Rate (RHR): Lower over time indicates improved fitness
– Heart Rate Variability (HRV): Higher variability signals better recovery and lower stress
Check these daily in your app. A sudden rise in RHR or drop in HRV may signal overtraining or illness.
Sync with Fitness Platforms
Connect your device to platforms like Strava, TrainingPeaks, Apple Health, or Garmin Connect. This lets you analyze trends, compare workouts, and share data with coaches or doctors.
Enable Zone Alerts
Set audible or haptic alarms to notify you when you enter or exit a target zone, exceed max heart rate, or drop below recovery threshold. These cues help maintain discipline during interval training without constantly checking your watch.
Troubleshoot Inaccurate Readings Fast
Follow This 5-Step Checklist
If your heart rate seems off, run through these steps:
- Tighten the band to eliminate light gaps under the sensor
- Clean the lens with a dry cloth to remove sweat, dirt, or lotion
- Reposition the watch slightly higher on your forearm
- Check for tattoos or dark skin and consider alternative placement
- Verify with a manual pulse by counting beats at your neck for 15 seconds and multiplying by 4
If problems persist, reset the device or pair with a chest strap temporarily.
Handle Cold Weather Challenges
In cold climates, blood vessels constrict and reduce wrist blood flow, delaying sensor lock-on. Workarounds include warming your hands before starting, wearing a thin glove or neoprene sleeve, and starting indoors before moving outside.
Know When to Seek Medical Guidance
Wrist heart rate monitors are fitness tools, not diagnostic equipment. They can flag irregularities, but should never replace medical evaluation.
Contact a healthcare provider if your device shows:
– Persistent resting HR above 100 or below 40 bpm
– Irregular rhythms such as AFib alerts
– Symptoms like dizziness, chest pain, or shortness of breath
If constant monitoring causes anxiety, limit tracking to workouts only, disable notifications, or consult a professional.
Frequently Asked Questions About Wrist Heart Rate Monitors
How accurate are wrist heart rate monitors compared to chest straps?
Wrist monitors using PPG technology are moderately accurate during rest and steady-state cardio, but chest straps using ECG are the gold standard. Chest straps directly measure electrical heart signals and remain accurate during high-intensity intervals, while wrist sensors struggle with motion, skin tone, and tattoos.
Where should I wear my wrist heart rate monitor?
Place it on your non-dominant hand, about one finger-width above the wrist bone. This position offers consistent blood flow and reduces bone interference. Avoid tattooed areas, and tighten the band one notch more than usual during high-intensity workouts.
How long does it take for a wrist heart rate monitor to get a reading?
Most optical sensors need 1–2 minutes to lock onto your pulse, especially in cold environments. Keep your arm relaxed at your side during this window and avoid lifting your wrist to check the screen, since this disrupts sensor contact.
Can wrist heart rate monitors track swimming accurately?
Many wrist monitors are water-resistant but not all track heart rate accurately in water. Water refracts light and creates gaps between the sensor and skin. For reliable swim data, choose a model rated for underwater heart rate tracking or pair a chest strap like the Polar H10 with your watch.
Do tattoos affect wrist heart rate monitor accuracy?
Yes. Dark tattoo ink absorbs the green LED light used in PPG sensors, blocking the signal from reaching capillaries. If your wrist has a tattoo under the sensor, expect signal loss or false readings. Solutions include wearing the watch above the tattoo, switching arms, or using a chest strap.
How do I calculate my personal heart rate training zones?
Use the revised formula: HR Max = 208 – (0.7 × Age). Then apply the Karvonen method for precision: measure your resting heart rate over 3 mornings, calculate Heart Rate Reserve (HR Max – RHR), and multiply by your target zone percentage, then add RHR. Program these zones into your device for real-time alerts.
Key Takeaways for Using Your Wrist Heart Rate Monitor
Getting reliable data from a wrist heart rate monitor comes down to three essentials: proper fit, accurate setup, and awareness of sensor limitations. Wear it snugly one finger-width above the wrist bone, input your personal metrics, and allow 1–2 minutes for lock-on before checking readings. Calculate your HR Max using the revised formula and program personalized training zones so your device alerts you when you drift off target.
Remember that PPG technology has limits. Motion, cold weather, tattoos, and darker skin tones can all reduce accuracy. For casual tracking, sleep, and daily activity, wrist monitors excel. For serious training or race-day precision, consider pairing with a chest strap. Start by tightening your band, cleaning the sensor, and verifying readings with a manual pulse check, then fine-tune your setup based on your activity and environment.