How to Use a Heart Rate Monitor for Cycling
You’re pedaling hard on a familiar climb, legs burning, lungs working overtime. But are you actually training the right energy system, or just grinding through another mediocre ride? Without objective feedback, most cyclists train by feel, which often means too many junk miles and not enough focused intensity. A heart rate monitor for cycling solves this by showing exactly how your body responds to every watt, gradient, and gear change.
This guide walks you through everything from choosing the right strap to executing zone-specific workouts. You’ll learn how to establish your personal baselines, structure training around five proven heart rate zones, and avoid the common mistakes that waste time and stall progress. By the end, you’ll know how to turn raw BPM data into smarter rides and faster fitness gains.
Select the Right Heart Rate Monitor for Cycling
Chest Strap vs. Optical Sensor
For cycling, a chest strap delivers the most reliable data. These sensors use ECG technology to detect the electrical signals triggering each heartbeat, staying accurate even during sprints and rapid effort changes. Optical sensors built into smartwatches and arm bands are more convenient but can falter when sweat, vibration, and sudden intensity shifts interfere with the LED readings.
If interval precision matters, choose a chest strap. For casual riding or multi-sport tracking, a quality optical sensor works, but expect occasional signal hiccups during hard efforts.
Match Connectivity to Your Devices
Your monitor must pair with your cycling computer, phone, or smartwatch. Look for dual support of ANT+ and Bluetooth (BLE). Most modern monitors broadcast both protocols, but older bike computers often require ANT+ while phones rely on Bluetooth.
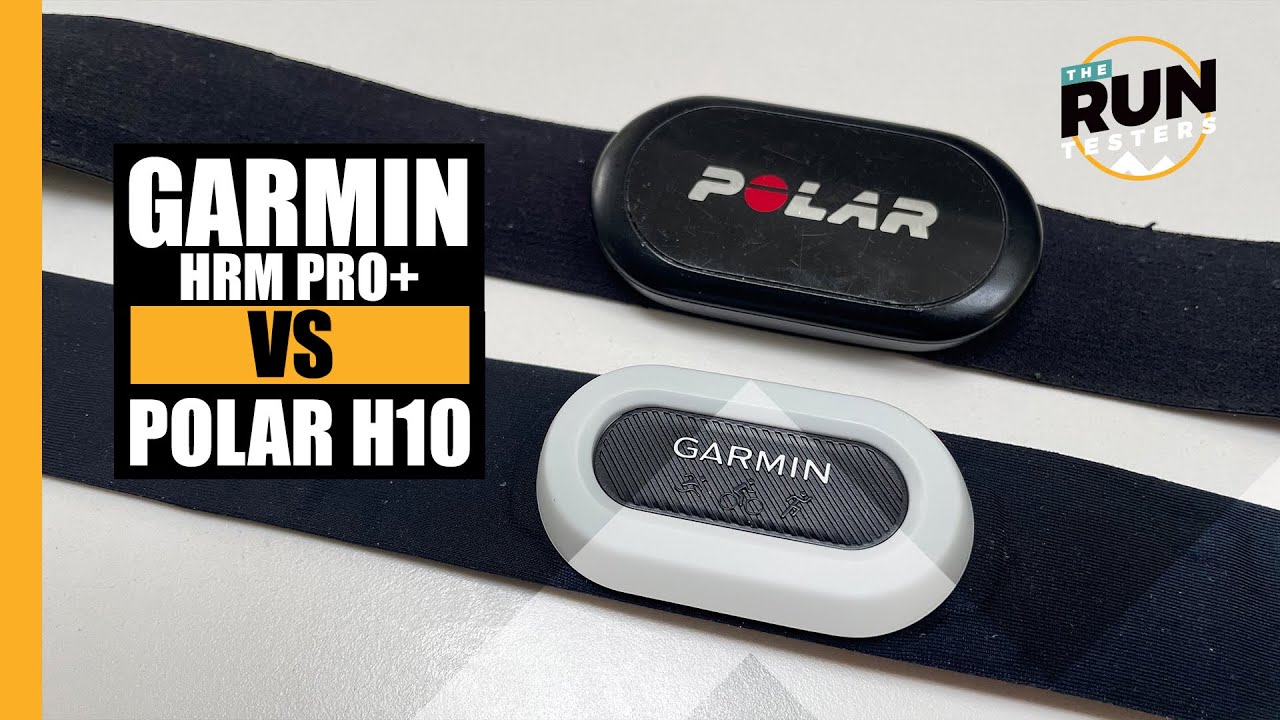
A dual-protocol monitor like the Polar H10 or Garmin HRM-Pro Plus gives you flexibility across platforms. Always check your display device’s specs before purchasing.
Prioritize Fit and Comfort
A poorly fitted strap causes inaccurate readings and skin irritation. Consider these features:
- Adjustable sizing (Polar H10 offers XS–S and M–XXL options)
- Side clasp design to avoid sternum pressure
- Silicone grip dots that prevent slipping when wet
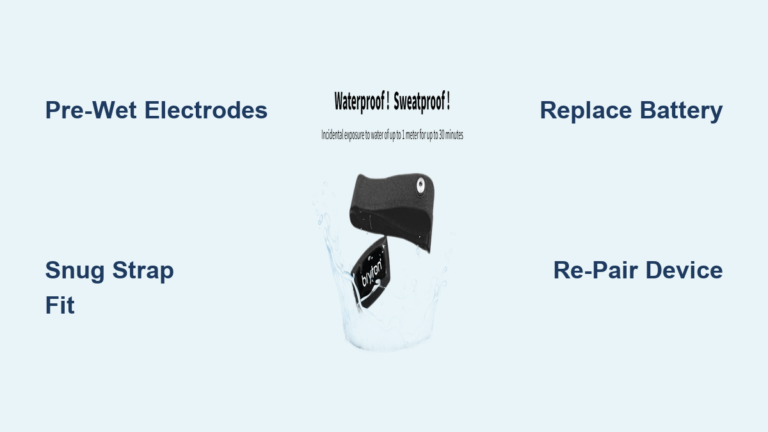
Moisten the sensor pads with water or electrode gel before each ride. This improves conductivity and stabilizes the signal, especially during the first few minutes of exercise.
Set Up and Pair Your Monitor
Attach the Strap Correctly
Position the strap just below your pectoral muscles with the sensor centered on your chest. It should feel snug without restricting breathing. For side-clasp models, align the sensor directly under your sternum.
When you raise both arms overhead, the strap should stay in place. If it slides down, tighten it or try a smaller size.
Sync With Your Cycling Computer or App
- Moisten the strap sensors (this often powers the unit on automatically).
- On your bike computer or phone app, navigate to Sensors > Add New.
- Select Heart Rate and wait for the device to detect your strap.
- Confirm the pairing when the displayed ID matches your monitor.
Once connected, your screen will show real-time BPM. A quick walk or light jog before pairing can speed up detection by raising your heart rate slightly.
Establish Your Personal Heart Rate Baselines

Measure Resting Heart Rate (RHR)
Your resting heart rate reveals cardiovascular fitness and recovery status. Track it daily for meaningful trends.
How to measure:
– Check immediately upon waking, before sitting up
– Use your monitor or count your pulse for 30 seconds, then multiply by 2
– Record the value consistently at the same time each day
A gradual decline in RHR signals improving fitness. A sudden spike often indicates fatigue, illness, or poor sleep, signaling a need for easier training.
Determine Your Maximum Heart Rate (HR max)
The “220 minus age” formula is unreliable. Find your true maximum with a field test:
- Warm up for 30 minutes at an easy, conversational pace.
- Increase to moderate intensity (Zone 3) for 15 minutes, finishing at the base of a climb.
- Find a 5–6% gradient and ride hard for 5 minutes, building effort progressively.
- In the final minute, go all-out for peak heart rate.
- Record your highest BPM and repeat the test 1–2 weeks later to confirm.
Consult a physician before testing if you have cardiovascular concerns.
Find Your Functional Threshold Heart Rate (FTHR)
FTHR is the highest heart rate you can sustain for roughly one hour. It offers a more practical anchor for training zones than HR max.
Field test:
1. Warm up for 20 minutes.
2. Complete a hard 20-minute time trial on a flat road or indoor trainer.
3. Multiply your average 20-minute heart rate by 1.05 to estimate FTHR.
Use this number to calculate your personalized training zones.
Apply the Five-Zone Training System
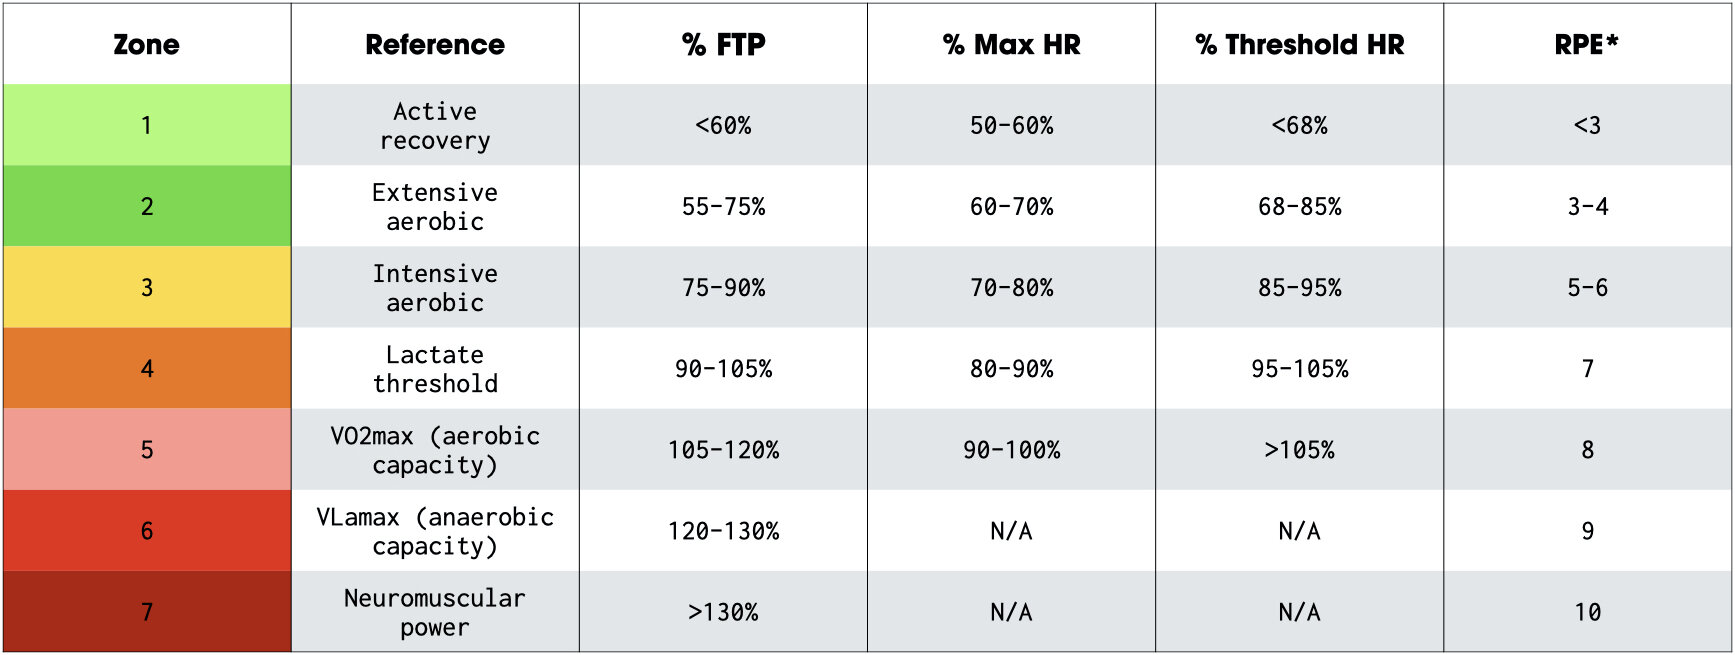
Zone 1: Recovery (50–59% HR max)
- Purpose: Active recovery and warm-ups
- Feel: Easy breathing, full sentences
- Use: Post-hard-day spins, cool-downs
Zone 2: Endurance (60–69% HR max)
- Purpose: Build aerobic base and fat-burning capacity
- Feel: Comfortable, rhythmic breathing
- Use: Long rides, base-building blocks
Most cyclists ride Zone 2 too fast. Stay disciplined here. Speed will increase naturally as your aerobic engine grows stronger.
Zone 3: Tempo (70–79% HR max)
- Purpose: Improve cardiovascular fitness
- Feel: Short phrases only, deeper breathing
- Use: Medium-long efforts, race simulation
Zone 4: Lactate Threshold (80–89% HR max)
- Purpose: Boost sustainable power and lactate clearance
- Feel: Hard effort, limited speech
- Use: Threshold intervals like 4×5 minutes
Zone 5: VO2 Max (90–100% HR max)
- Purpose: Increase peak power and speed
- Feel: Gasping, maximal effort
- Use: Short intervals such as 30 seconds to 3 minutes
Execute Zone-Specific Workouts
Build Aerobic Base in Zone 2
Ride 60–90 minutes strictly in Zone 2. On flat terrain, use smaller gears to keep heart rate controlled. If your BPM drifts upward, ease off rather than chasing speed. This zone trains your body to oxidize fat efficiently and builds capillary density.
Improve Threshold in Zone 4
After a 15-minute warm-up in Zones 1–2, complete 4×5 minutes in Zone 4 with 5 minutes of Zone 2 recovery between efforts. Cool down for 10 minutes.
Start easing off 5–7 BPM below your Zone 4 ceiling. Heart rate lags behind effort, so reducing power early prevents overshooting.
Boost VO2 Max in Zone 5
Warm up for 20 minutes, then complete 8×20 seconds all-out with 40 seconds easy spinning between reps. Cool down for 10 minutes. Limit these sessions to once per week, as they are highly taxing.
Avoid Common Heart Rate Training Mistakes
Don’t Chase the Number
Heart rate responds slowly to effort changes. If you sprint up a hill, your BPM keeps climbing even after you stop pedaling. Anticipate zone limits and reduce effort at 93–95% of your target to prevent overshooting.
Track Time-in-Zone, Not Averages
An average heart rate of 145 BPM could represent two hours steady in Zone 2, or one hour in Zone 1 and one hour in Zone 4. Review time-in-zone data after each ride to understand what actually happened.
Adjust for Environmental Factors
Heat, humidity, dehydration, caffeine, altitude, and fatigue all elevate heart rate. On hot days, expect BPM to run 10–15 higher at the same effort. Listen to your body rather than forcing strict zone compliance in extreme conditions.
Compare Heart Rate and Power Training

Heart rate measures physiological response, showing how hard your body is working. It reflects sleep quality, stress, and recovery status, making it ideal for guiding easy days and detecting overtraining.
Power meters measure mechanical output in watts. They respond instantly and ignore external variables, but reveal nothing about fatigue or illness.
For most cyclists, heart rate is the most accessible and insightful tool. Pair it with power when possible to add physiological context: a lower-than-expected heart rate at a given wattage may signal fatigue or incomplete recovery.
Maintain Your Heart Rate Monitor
Clean After Every Ride
Rinse the strap with water after each session to remove sweat and bacteria. Hand wash monthly with mild soap, and remove the sensor pod if it’s detachable. Never machine wash unless the manufacturer explicitly permits it.
Replace Batteries and Straps
Most chest straps use CR2032 coin cells lasting 1–3 years. Some models like the Wahoo Tickr feature rechargeable batteries with roughly 100 hours of life. Straps degrade over time. When yours slips or feels brittle, replace just the strap and keep the sensor pod to save money.
Top Heart Rate Monitor Picks for Cyclists
Best Overall: Polar H10
The Polar H10 offers unmatched accuracy, internal memory for store-and-forward data, and dual strap sizes. At around $105, it suits serious cyclists and multisport athletes who demand precision.
Best Value: 4iiii Viiiiva
The 4iiii Viiiiva bridges ANT+ to Bluetooth, includes 65 hours of internal memory, and fits a wide range of chest sizes (57–132 cm). It’s ideal for riders using older ANT+ sensors with Bluetooth-only devices.
Budget Pick: Garmin HRM-Dual
The Garmin HRM-Dual delivers reliable data at an entry-level price. It pairs with all Garmin devices but lacks internal memory and uses a less flexible strap that requires a tighter fit.
Frequently Asked Questions About Heart Rate Monitors for Cycling
What heart rate monitor is most accurate for cycling?
Chest strap monitors using ECG technology, such as the Polar H10, provide the highest accuracy for cycling. Optical wrist sensors can struggle with motion artifacts and sweat during high-intensity intervals.
How do I find my maximum heart rate for cycling?
Perform a field test: warm up for 30 minutes, ride moderately for 15 minutes, then complete a 5-minute maximal effort climb. Your peak BPM during the final minute is your HR max. Repeat 1–2 weeks later to confirm.
What is a good resting heart rate for cyclists?
Trained cyclists often have resting heart rates between 40 and 60 BPM. Lower values generally indicate stronger cardiovascular fitness, while sudden increases may signal fatigue or illness.
How often should I do Zone 2 training?
Most cyclists benefit from 2–3 Zone 2 sessions per week, totaling 4–8 hours. This builds the aerobic base needed for endurance events and improves fat metabolism.
Can I use a smartwatch instead of a chest strap?
Smartwatches with optical sensors work for casual riding but lose accuracy during sprints, intervals, and high-sweat conditions. For structured training, a chest strap remains the gold standard.
Why does my heart rate stay high after I stop pedaling?
Heart rate lags behind effort due to physiological delay. Your cardiovascular system needs time to wind down, especially after hard efforts. This is normal and called cardiac drift or the lag effect.
Final Thoughts on Using a Heart Rate Monitor for Cycling
Learning how to use a heart rate monitor for cycling transforms guesswork into precision. Start by establishing your resting heart rate and maximum heart rate through proper field testing. Then structure your training around the five-zone system, focusing on time-in-zone rather than average BPM. Respect the lag effect, adjust for environmental factors, and avoid the temptation to chase numbers on every ride.
Your heart rate monitor is one of the most powerful training tools available to cyclists. Use it consistently, interpret the data wisely, and you’ll build fitness faster, recover smarter, and ride with greater confidence in every session.