Plyometric Cardio Exercises: Quick Steps
You’re not just burning calories on the mat or track—you’re building explosive power, torching stubborn fat, and teaching your body to move like an athlete. Plyometric cardio exercises combine high-intensity jumps and rapid-fire movements to spike your heart rate while sharpening speed, agility, and raw strength. Unlike steady-state cardio, which keeps your pace locked in for long stretches, plyo cardio uses short bursts of all-out effort followed by brief recovery, making it one of the most time-efficient ways to transform your fitness.
These moves rely on a simple but powerful principle: your muscles stretch on landing, store energy like coiled springs, then unleash it in the next jump. This trains the fast-twitch fibers responsible for sprinting, dunking, or catching yourself on a slippery step. But here’s the catch most people miss. If you crank out 30 jump squats in a row without rest, you’re not doing true plyometrics. You’re just doing cardio conditioning. Real plyo is about explosiveness, not endurance. When fatigue sets in, form collapses, and so do the benefits.
This guide breaks down everything you need to know: the science-backed mechanics, the safest way to train, top exercises by category, sample workouts, and the critical mistakes that sideline beginners. Whether you’re an athlete chasing peak performance or someone who wants to burn fat and boost overall fitness, this is your complete roadmap to mastering plyometric cardio safely and effectively.
Decode Plyometric Mechanics

How Plyometrics Ignite Power
Plyometric cardio is physics in motion. Every hop, bound, or leap uses the stretch-shortening cycle, where your muscles rapidly stretch during the eccentric phase and immediately contract during the concentric phase. Picture your legs as high-performance springs: when you land, they compress; when you jump again, they rebound with stored elastic energy. This mechanical advantage builds power, which is the fusion of strength and speed working together.
These movements specifically target fast-twitch muscle fibers, the engines behind explosive actions like jumping, sprinting, and rapid direction changes. That’s why athletes across basketball, volleyball, and track rely on plyos to jump higher, swing faster, and react quicker. You don’t need to be elite to benefit, though. Even low-impact versions like small pogo hops train the exact same neuromuscular pathways at a gentler intensity.
Why Plyo Is Not Just Cardio
True plyometric cardio differs from traditional aerobic exercise in three fundamental ways:
- Intensity: You go all-out for seconds, not minutes.
- Energy System: It taps the anaerobic system, not the steady aerobic one.
- Goal: Quality crushes quantity. One perfect jump beats ten sloppy ones.
If you can bang out 20+ reps without stopping, you’re likely doing conditioning, not plyometric training. Real plyo demands full recovery between sets so each rep stays explosive. That’s why sessions are so short. You might only need 10 to 20 minutes of actual work to get the full benefit.
Maximize Benefits Safely
Boost Power and Prevent Injury
Plyometric cardio doesn’t just make you fitter. It makes you more resilient. By training your body to absorb impact and explode out of it, you improve shock absorption in your joints, which reduces injury risk during sports and daily life. Stronger tendons and ligaments stabilize your knees and ankles, while improved neuromuscular coordination sharpens your reaction time on the field or in the gym.
Bone density also gets a serious boost from controlled impact. This becomes critical as the years pile on, since power declines faster than strength, affecting balance and mobility. Plyo helps preserve that explosiveness, making stairs feel easier and falls less likely.
Burn Fat and Elevate Metabolism
Yes, you’ll sweat, and you’ll sweat a lot. Plyometric cardio spikes your heart rate fast, burning 10 to 15 calories per minute depending on your effort level. But the real fat-loss magic happens after your workout ends. Excess post-exercise oxygen consumption (EPOC) keeps your metabolism elevated for hours. Building lean muscle also raises your resting metabolic rate, helping you torch more calories even while you sleep.
Pair this training style with a balanced diet, and you’ve got a powerful tool for fat loss without spending endless hours on the treadmill.
Avoid High-Risk Mistakes
Know When to Skip Plyo
Not everyone should jump right into high-impact training. Plyometric cardio is demanding and requires solid joint health plus a baseline of fitness. Skip it or modify heavily if you have:
- Knee, hip, or back pain
- Arthritis
- Balance issues
- Heart conditions
- Uncontrolled diabetes
- Pregnancy
Beginners should master basic bodyweight movements first: air squats, reverse lunges, and planks. Only when your form is flawless from top to bottom should you add the jump element.
Land Like a Pro
Most injuries happen on the landing, not the jump itself. To protect your joints and stay in the game:
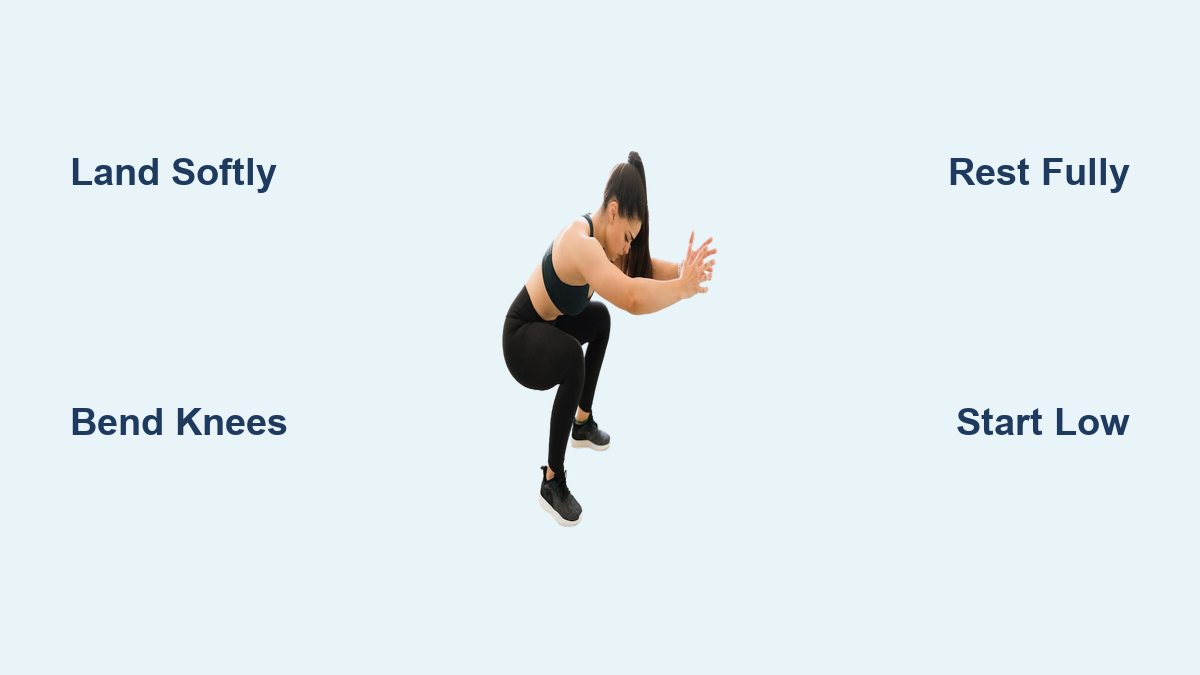
- Land softly: Quiet feet mean less impact traveling up your skeleton.
- Bend your knees: Absorb force like the shock absorbers in a car.
- Knees over toes: Never let them cave inward (valgus collapse).
- Foot strike: Land on the balls of your feet, then roll to the whole foot.
- Engage your core: A tight core stabilizes your spine on every landing.
Think “cat-like” landings. Light, controlled, and ready to spring again.
Choose the Right Surface
Protect Joints with Smart Surfaces
Where you train matters just as much as how you train. Hard surfaces like concrete or tile transfer full impact straight to your joints. Instead, choose surfaces with some give:
- Thick exercise mats
- Grass or dirt
- Padded gym flooring
- Carpeted wood floors
Avoid thin yoga mats since they offer zero real cushion. And never jump barefoot on hard floors. Good athletic shoes with proper cushioning help, but smart surface choice is non-negotiable for joint health.
Program for Results
Frequency and Recovery Rules
Plyo is demanding on your muscles and your nervous system. Overtraining leads to breakdown, not gains. Follow these recovery rules:
- Beginners: 1 session per week
- Intermediate: 2 sessions per week
- Advanced: Up to 3 sessions, with rest days between
- Never daily: Your body needs 48+ hours to fully recover
Sessions last 10 to 30 minutes including warm-up. The actual work? Just 5 to 15 minutes of explosive, focused effort.
Reps, Sets, and Rest
- Reps: 3 to 5 for maximum power, 8 to 12 for cardio-focused circuits
- Sets: 1 to 3 per exercise
- Rest: 60 to 90 seconds between sets for full recovery
- In circuits: 15 to 30 seconds rest to keep your heart rate elevated
More is not better here. Fatigue kills form, and form is what builds power.
Warm Up and Cool Down
Activate Before You Jump
Cold muscles are injury magnets waiting to happen. Spend 3 to 5 minutes on dynamic warm-up moves:
- Arm circles
- Leg swings
- Bodyweight squats
- Jumping jacks
- High knees (light effort)
- Lunges with rotation
Skip static stretching before your workout. Save that for the cool-down phase.
Recover with Stretching
Cool down with 5 minutes of static stretches:
- Forward fold (hamstrings)
- Standing quad stretch
- Seated spinal twist
- Shoulder cross-body stretch
- Child’s pose
Add 1 minute of slow marching in place to bring your heart rate down gradually.
Master Key Exercises
Start with Low-Impact Plyo
Pogo Hops
Stand with feet together and elbows bent. Jump straight up just 1 to 2 inches, landing on the balls of your feet. Rebound immediately, like a pogo stick.
Pro tip: Keep jumps tiny. Focus on speed and rhythm, not height. Great for postpartum recovery or return-to-impact training.
Lateral Pogo Hops
Same as pogo hops, but jump side to side instead of straight up. Targets inner and outer thighs while improving lateral stability.
Form cue: Keep hips level and don’t drop one side.
Pop Squat
Start with feet wider than hips. Squat down, jump feet together, hop once, then jump feet wide back into the squat position.
Rhythm: Squat → Jump In → Hop → Jump Out → Squat. Builds coordination and rhythm.
Build Lower Body Power
Jump Squat
Perform a regular bodyweight squat, then explode upward into a jump. Land softly back into the squat position.
Avoid: Letting your knees collapse inward. Squeeze your glutes hard on every landing.
Tuck Jump
Jump vertically, bringing your knees up toward your chest at the peak. Land with knees bent and core tight.
Difficulty: Advanced. Best reserved for experienced athletes.
Box Jump
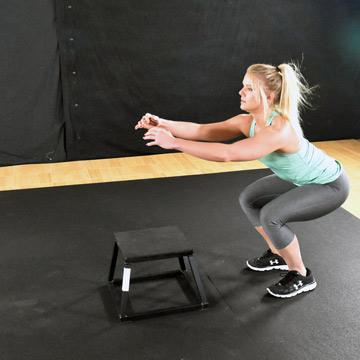
Stand about 12 inches from a sturdy box. Swing your arms, bend your knees, jump up, and land softly with knees extended. Step down, don’t jump off.
Safety first: Start with just 1 to 2 inches of height. Master the landing before going higher.
Broad Jump
Stand shoulder-width apart. Swing your arms back, then jump forward as far as possible. Land with soft knees.
Use it: For horizontal power, which is critical in sports like football or long jump.
Train Lateral and Multi-Directional
Skater Hop
Jump laterally to the right, landing on your right foot while your left leg sweeps behind. Immediately jump to the left.
Mimics: Speed skater motion. Builds hip stability and coordination.
Lateral Lunge to Single-Leg Hop
Lunge sideways, then drive off that leg into a small hop.
Why it works: Trains frontal plane movement, which is often neglected but essential for real-world agility.
Crab Walk to Jump
Walk laterally in a crab position (hands behind you, hips up), then add a vertical jump.
Bonus: Strengthens glutes and triceps while boosting power.
Add Upper Body and Full-Body Moves
Hands-Release Push-Up
Lower your chest to the floor, then push up hard enough to lift both hands off the ground.
Plyo element: The explosive push creates real upper-body power.
Burpee
Squat → plank → push-up → jump feet in → vertical jump.
Total-body burner: Hits every major muscle group. Modify by removing the push-up or jump if needed.
Mountain Climbers (Explosive)
Drive your knees to your chest fast, with a bouncing quality in your shoulders.
Plyo version: Maximum speed and minimal ground contact.
Plank Jack
Hold a plank position, then jump your feet out and in like a horizontal jumping jack.
Core challenge: Keep hips level with no swaying.
Customize Your Workout

Try the 30-Minute Circuit
3 rounds | 60 sec rest after each circuit
Circuit 1:
– Jump Squats: 12 reps
– Push-up to Shoulder Tap: 10 reps
– Lateral Bounds: 12 per side
– Mountain Climbers: 30 seconds
Circuit 2:
– Reverse Lunge to Knee Drive: 10 per leg
– Burpees: 10 reps
– Skater Hops: 12 per side
– Plank Jack: 30 seconds
Circuit 3:
– Broad Jumps: 10 reps
– Jump Lunges: 10 per leg
– High Knees: 30 seconds
– Tuck Jumps: 8 reps
Why it works: Balances lower body power, core stability, and full-body cardio in one efficient session.
Or the 10-Minute Power Session
Warm-up: Dynamic movements (3 minutes)
Work: 45 seconds on / 15 seconds off
– Forward Shuffle to Back-Kick
– Side to Side Chasse
– Jumping Jack to Jab
Repeat twice.
Cool-down: Static stretching (5 minutes)
Perfect for: Busy days or as a high-intensity finisher after strength training.
Scale for All Levels
Modify for Safety and Success
Beginner Adjustments
– Step instead of jump (e.g., step back in a lunge)
– Reduce jump height to 1 to 2 inches
– Use a lower box (1 to 3 inches)
– Remove arm movements to focus on legs
– Mimic jump rope motion without the rope
Advanced Progressions
– Add single-leg variations like single-leg broad jumps
– Combine moves such as broad jump directly into a burpee
– Use light dumbbells only in non-jump phases
– Decrease rest time to increase cardio demand
– Increase jump distance or height
Warning: Never add weight to explosive jumps. It compromises speed and dramatically increases injury risk.
Fix Common Errors

Stop These Mistakes Now
Skipping Warm-Up
Cold muscles cannot handle explosive force. Always warm up dynamically for 3 to 5 minutes before any plyo work.
Stiff-Legged Landings
This sends shock straight to your knees and spine. Land with soft, deeply bent knees every single time.
Knees Caving In
Valgus collapse puts dangerous stress on your ACL. Focus on pushing your knees outward. Strengthen glutes with clamshells and banded walks.
Too Many Reps
More than 12 to 15 reps in a set means fatigue is setting in and form will break down. Keep reps low for true power training.
Heel Striking
Landing on your heels jars your joints. Aim for ball-to-full-foot contact on every landing.
Ignoring Core
A weak core leads to wobbly landings and back strain. Brace your abs like you’re about to take a punch to the stomach.
Training Daily
Plyo is not endurance training. Limit sessions to 1 to 3 times per week with mandatory rest days in between.
Starting Too High
Jumping onto a 24-inch box as a beginner is a recipe for disaster. Start with 1 to 3 inches and master the landing first.
Who Should (and Shouldn’t) Do Plyo
Ideal for Athletes and Intermediates
Best candidates include:
– Athletes needing explosive power for their sport
– Fitness enthusiasts with 1+ year of consistent training
– Weight loss seekers wanting maximum calorie burn
– Active older adults maintaining bone density and muscle mass
Even modified plyo, like small hops, benefits all fitness levels when done with proper form and intent.
Avoid If You Have These Conditions
Do not do plyometric cardio if you have:
– Joint pain in knees, hips, or back
– Arthritis
– Balance problems
– Heart disease
– Diabetic neuropathy
– Pregnancy
– Obesity (high BMI)
In these cases, low-impact alternatives like step-ups, resistance band movements, or pool workouts are much safer starting points.
Frequently Asked Questions About Plyometric Cardio Exercises
How often should beginners do plyometric cardio exercises?
Beginners should start with just one session per week. Your muscles, tendons, and nervous system need at least 48 hours to fully recover between plyo sessions. As your body adapts over several weeks, you can progress to two sessions per week, but never attempt daily plyo training.
Can plyometric cardio exercises help with weight loss?
Yes, plyometric cardio exercises are highly effective for fat loss. They burn 10 to 15 calories per minute during the workout and trigger EPOC, which keeps your metabolism elevated for hours afterward. Combined with a balanced diet, they create a powerful calorie deficit without long cardio sessions.
What is the difference between plyometric exercises and HIIT?
HIIT (High-Intensity Interval Training) is a broad format using short bursts of effort with recovery. Plyometrics are a specific type of explosive, jump-based movement. Plyometrics can be incorporated into HIIT workouts, but HIIT can also include non-jump exercises like sprints or kettlebell swings.
Do I need any equipment for plyometric cardio exercises?
No equipment is required. Most plyometric cardio exercises use only your bodyweight. A thick exercise mat is recommended for joint protection, and a sturdy low box helps with box jump progressions. Optional tools like medicine balls or resistance bands can add variety once you master the basics.
Is plyometric training safe for older adults?
Modified plyometric training can benefit active older adults by maintaining bone density and power, which declines rapidly with age. However, anyone with joint issues, balance problems, or osteoporosis should consult a doctor first and stick to very low-impact versions like small pogo hops.
What should I do if my knees hurt during plyometric exercises?
Stop immediately. Knee pain during plyos usually signals poor landing mechanics, such as knees caving inward or stiff-legged landings. Work on strengthening your glutes with exercises like clamshells, practice landing softly with bent knees, and reduce jump height. If pain persists, see a healthcare professional.
Key Takeaways for Mastering Plyometric Cardio
Plyometric cardio exercises deliver unmatched power, fat loss, and athletic performance, but only when executed with precision. Prioritize form over volume every single rep. Land softly with bent knees, allow full recovery between sets, and respect your body’s need for rest.
Start low with small jumps and low boxes. Progress slowly by adding height, distance, or complexity only after your landing mechanics are flawless. Let explosiveness, not exhaustion, define your success. Whether you’re building strength, burning fat, or boosting agility, plyo training transforms your fitness from the ground up when applied with knowledge and patience.
Your next step: Pick three exercises from this guide, warm up dynamically for five minutes, and perform two sets with perfect form. Quality over quantity starts today.